fbpx

Archive

Category Archives for "Tips and Tricks"

Can You Epoxy Over Epoxy? How to Apply a Second Coat of Resin

If you are doing multiple pours of epoxy to achieve your desired thickness, or perhaps the result of your first pour didn’t come out exactly how you expected, then you may be wondering if you can epoxy over epoxy. When using epoxy, it can be a helpful process to add a second layer, but you want to make sure to follow the correct procedures.
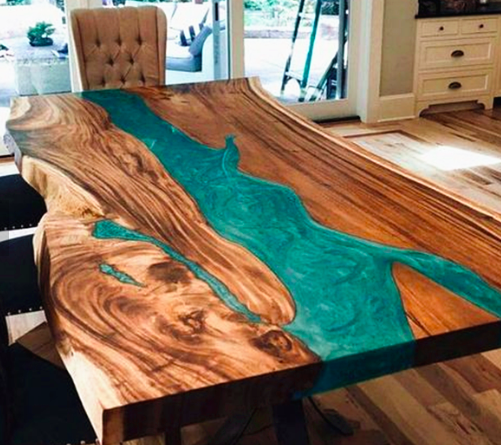
With most coating epoxies, if you are trying to build up to your desired thickness, it is recommended to pour your second coat once the first coat is tacky to the touch (usually 4-6 hours). However, if the coat is hard and has cured, its best to sand the surface before you re-pour in order for the second coat of epoxy to adhere to the first.  

If your surface is hard to the touch, follow these steps to prepare for your second coat, and what to do to make sure that your final finish comes out nice and smooth.

Can You Sand Epoxy?

Now, you might be asking: can you sand epoxy?  The answer is, yes. In fact, it is an important factor in being able to add a second layer of epoxy. You can also give your surface a light sanding in order to achieve less gloss/shine if you desire. But thats a tutorial for another time...

First, if you're epoxy has cured properly and is hard to the touch without imperfections, you can do a light sanding with 320-grit sandpaper in order to scuff the surface so that you can apply your next layer. If your epoxy has not cured properly or you have imperfections, its important to take care of these before you pour your next layer. If your epoxy is still tacky after 12 hours, it is likely didn’t mix the correct ratio of resin and hardener, or you did not mix them thoroughly. In this case, you would need to remove the tacky areas and sand it down, otherwise the layer will remain tacky underneath the new layer or epoxy and you risk your top layer not curing properly as well. This video goes into more detail on how to do that... 

Preparing for the Second Coat

When you are all done with the sanding and are happy with the smoothness and evenness of the surface, then you need to begin preparing for the application of the second coat. To do this, you want to make sure that you have a clean surface and work environment that will be free of debris and dust. These things may end up in the epoxy as it dries and sticks to it. This will cause imperfections and may leave the item in the layer.

Cleaning the area that you will be working in will go a long way to keep your epoxy resin clear of dirt and dust or other particles that could show up in it once it is dried. We suggest using Isopropyl Alcohol 99%. It is important that you use 99% as anything else will have water in the alcohol, and epoxy and water do NOT mix. 

After you have cleaned the area liberally, then you will want to ensure that you have a new container to mix your resin in. The container that you used last time, for the first coat, will not work because any unmixed epoxy can contaminate your next batch.

Get a fresh container and stirrer, and measure out the 1:1 ratio precisely, or as directed by the brand you are using. If this is not done well, then your resin will not harden as it needs to and will end up with a sticky finish that feels wet to the touch. Once this happens, there isn't a way to fix it without adding more resin, which costs more, so you want to double-check this stage every time you mix to ensure that you are doing it properly and not wasting any mixed product, especially because you won’t be able to use it again.

-Top Epoxy Pick-

Promise Table Top Epoxy 1 gallon

Pouring the 2nd Coat

When you have sanded down the first coat and finished preparing for the second coat, then you are now ready to pour on the second layer of epoxy resin. When doing this, you want to be generous with your pour so that the entire area is well coated with liquid and the self-leveling feature will work better. It is also best to mix a large amount at a time so that you can pour continuously before the resin hardens, and so you do not run out mid-pour.

Pro Tip: Always have more epoxy on hand than you think you might need. If you run out of epoxy in the middle of your surface, you cannot simply add more to the surface later as you will likely see a visible line where the first and second pour meet. 

You also want to use a heat source to pop any air bubbles that may form while the epoxy resin is leveling out. As you pour the mixture onto the first layer, there may be some pockets of air that form bubbles, and using the heat source to pop them and smooth out the area will stop the resin from starting to harden, which can keep the bubble in place and enable you to see the air bubble in the finished coat.

Then, you will let the second layer cure for 12-24 hours. You can continue this process to build the coat to your desired thickness.

Conclusion

Adding a second layer of epoxy resin can be a great way to fix leveling issues, get rid of imperfections, build up the thickness and ensure that your surface has hardened properly so that you have a solid surface once the resin has fully cured. Following these tips will ensure that you get the best results so that your project comes out as good as possible.

Resin Coverage Calculator: How Much Epoxy Do I Need?

If you're preparing to add a coat of epoxy to something, you're definitely wondering how much epoxy you need. This is a question that brings a lot of stress for inexperienced epoxy users, because once you start mixing the epoxy you feel like you're in a race against the clock to get it mixed and poured before it starts gelling, and you want to have everything you need ready to go before you start.

How much epoxy you need will depend on several different factors; there's no one right answer for every situation. We'll go over all the different things you need to take into account before you start measuring out your resin and your hardener, and try to give you as much clarity as possible.

Calculate How Much You Need:

  • Project Size SQFT

  • Hidden
    Seal Coat Coverage (Gallons Required):
  • Total Epoxy Needed

  • Hidden
    Total Gallons Needed:

Calculating Coverage: Consider These Factors

Will you be doing a seal coat?

If you're applying epoxy to a porous surface, the answer is probably yes. That changes things a bit when you're calculating the amount of epoxy you need.

A seal coat is a thin layer of epoxy that you apply with a brush. On wood or other porous surfaces, the seal coat prevents air bubbles from forming in the final epoxy layer. It's a thing enough layer that if air is bubbling out of the wood, it won't get trapped by the epoxy. You can just brush over that spot again after the air escapes. Then, once the seal layer has cured, you can apply the final, thicker layer of epoxy without worrying about air bubbles.

General Rule: Most (but not all) coating epoxies cover approximately 12 square feet per mixed gallon (1/2 Gal Part A and 1/2 Gal Part B) at 1/8 inch thickness. 

As referenced in our general rule above, 12 sqft is a relatively conservative approach when working with 1:1 coating epoxies. When using a specific brand resin calculator like the one provided by Promise Epoxy, you'll notice that their recommended coverage is actually 16 sqft at 1/8inch. Again, each brand/manufacturer is slightly different in provided or recommended coverage as well as self-leveling thickness. Most often 1 to 1 epoxies will level around 1/8 inch if not dammed or sealed edges, but check with each manager for confirmation. This can often be found in detail pages or Technical Data Sheets. 

A seal coat is an extra layer of epoxy, albeit a thin one. You'll need to purchase more epoxy if you're using a seal coat than you would if you weren't using a seal coat. Do not mix the epoxy for both the seal coat and the final coat at the same time, though. You won't be applying the final coat until the seal coat has cured. If you mix all the epoxy at once, it will cure in the bucket while you are waiting for the seal coat to cure.

Are you damming the edges of the surface or letting the epoxy flow over?

Another way of saying this, are you controlling the thickness of the coat or letting the epoxy settle over the surface naturally? Damming the edge of the surface gives you complete control over the thickness of the final layer, but it can be difficult to remove the material you used to dam the edges.

If you're using self-leveling epoxy, it is designed not to be dammed in. It will self-level at a thickness of about 1/8 of an inch. Most epoxy sold for home use is self-leveling. As you can imagine, this has the potential to create an extreme mess, so if you're using this kind of epoxy you'll want to cover everything that isn't being coated in epoxy with plastic sheets.

The amount of epoxy you need will depend on whether or not you're letting it self-level or if you're damming it in. For two equally-sized surfaces, you would need less epoxy to achieve a coat of the same thickness if you use a dam than if you let it flow over the edges.

How thick are you pouring?

Most epoxies are designed to self-level to create a coat that is 1/8 of an inch thick. Is that thick enough for you? If you are trying to create a thicker coat of epoxy, you're going to need a lot more. If you want to create a thinner coat, well, you'd need less but you also probably shouldn't try that. Epoxies want to settle out to a coat 1/8 inch thick; it's easy to add more to that, but it's very difficult to make it thinner while keeping it level.

Making it thicker also requires the use of a dam or a mold to hold everything in. This means you may not need as much extra epoxy as you might think to create a thicker layer, since you won't have any epoxy running off the edges.

More videos ⇒

Pro Tip: Don't buy casting resin

Casting resin is thinner than coating epoxy, which means it spreads more and you could use a smaller amount of it to cover the same surface area. However, casting epoxies do not make good coats. Casting resin is really meant for use in encasing things for display, not forming a protective coating on a broad surface. They will not provide the same level of durability and protection as a coating epoxy will, because they are designed to be poured into very thick layers, rather than spread out over a counter top or a table in a thin layer. They simply aren't strong in layers that thin.

General rule for epoxy coverage

There is a general rule to help you understand how much epoxy you need. For coating epoxies, one mixed gallon (half a gallon each of resin and hardener) will cover twelve square feet at a thickness of 1/8 of an inch. This may vary by brand though, so always check the manufacturers instructions to be sure.

Pro Tip: Always have more epoxy on hand than you think you need. Its better to have more than enough than not enough, otherwise you will likely need to re-sand the entire surface and pour your project again. 

Another pro tip: you should always have more epoxy on hand than you think you might need. If you run out of epoxy in the middle of a table, you can't simply apply epoxy to the rest of the table later. There will be a visible line where the first pour meets the second. If you run out of epoxy, you are going to have to sand the first pour, and then re-pour the whole project. This will not only cost you a lot more time and frustration, but also more money.

Conclusion

The exact amount of epoxy you need is going to vary by brand, while the general rule of one gallon per twelve feet is a good starting place, you should always double check before you buy and make sure to buy and mix more than you think you need.

How To Color Epoxy Resin with Paint and Pigment

Epoxy is typically as clear as glass, and many people prefer it that way. Unfortunately, even the best epoxy will tend to yellow over time, and what was once a smooth, glass-like covering becomes unsightly and old-looking. Colored epoxies don't suffer from this yellowing effect, so they tend to age better than clear epoxies.

Colored epoxies can also create stunning works of art that just as functional as they are beautiful. A quick image search for "river table" will show you the kind of visual appeal that colored epoxies can have. Those are far from the only thing you can do, though. You can use colored epoxy to fill in cracks and gaps in an old table, creating a totally unique design. You can also use different colored epoxies, applied at different stages, to create multicolored designs.

Colored epoxies have been used to create furniture pieces that sell for thousands of dollars online, but the truth is that they're dead simple to make and use at home. You can make your own designer furniture for a fraction of the cost.

What you can do with colored epoxy?

River tables are the most common example of what colored epoxy is used for right now. If you love the look of these tables, but don't want to spend the money, you're in luck. River tables are among the easiest colored epoxy projects you can take on. All you need is a wooden table with at least one wooden side (or just a wooden table of you like the color scheme but don't care about the river effect).

What you'll do is mix up a batch of blue epoxy, and apply it to the center of the table. You can create a perfectly straight line of blue if you want by using small pieces of wood or plastic to line the center of the table. If you want a more irregular design, often called a live edge, you'll need irregular slabs of wood. In these case, the colored epoxy is both decorative and an adhesive to hold the wood together.

Colored epoxy can also be used to decorate stainless steel tumblers, create a unique finish on a counter top or table, and to create works of art to hang on the wall. It's most common use is as a way use irregularly shaped pieces of wood as decoration. It fills in the gaps nicely and creates entirely unique works of art. It can be used anywhere you would use clear epoxy, though.

Using colored instead of clear epoxy prevents yellowing in the epoxy coat. Yellowing occurs over time with clear epoxy, and it doesn't look good. Colored epoxy ages much better than clear epoxy.

How to add pigment to your epoxy

Adding pigment to your epoxy is easy. Follow the normal instructions for mixing your epoxy. Once it's mixed, add the pigment and mix it in. That's it. The type of pigment you choose matters a lot, though. There are many different types of pigment, but not all of them are really good for your epoxy.

EPOXY & COLORANTS USED IN THIS VIDEO

Promise Table Top Epoxy 1 gallon
Color Creator Premier Kit

Water/oil based paints

If you already have some paints lying around, it may be tempting to simply use them to add color to the epoxy. Do not do this. Water or oil based paints will cause problems with the cure and could ruing the epoxy. Remember that your epoxy is based on a precise chemical formula, and adding anything to it could throw off the chemical reaction that makes epoxy.

Important Note: Epoxy and Water/Oil Do NOT Mix! Using water-based or oil-based paints can cause a reaction with the epoxy which could ruin your project, or cause the epoxy to heat up, smoke, crack, etc.

These paints also will not effectively color your epoxy. They are not meant to be diluted, and using them in epoxy would require a lot of dilution, leading to dull colors.

Liquid epoxy pigments

These are probably the most popular choice, because it's easy to mix them in evenly. You can get great results from these and you'll get nice, even coloring. Unfortunately, because they are liquid, even coloring is all you will get. Your epoxy will be one flat color, and will be evenly colored throughout. If that's what you want, then these are perfect. If you want more variation in the coloring, keep reading.

Pigment powders

Pigment powders deliver rich, deep colors. They won't mix in as easily or as evenly as liquid pigments, which sounds like a bad thing but it really isn't. It creates slight variations in the coloring that can add a lot of visual interest to the finished product. Instead of a perfect, flat blue, you'll get a blue that varies intensity from one spot to another, fading from bright to dark, royal to light blue, and more.

Mica Pigment Powders

These are usually the best way to color your epoxy. Mica is a naturally occurring mineral that has a metallic sheen to it. These powders are made of ground up mica with pigment added. With these, you get all the advantages of a pigment powder- deep colors and nice variations- along with a great metallic finish that really makes the epoxy shine.

How much pigment to use

Remember that making epoxy requires a chemical reaction, and adding too much of any substance can throw that reaction off and prevent the epoxy from curing properly. That's one of the reasons why pigments are so much better than paints or dyes; they're very concentrated, and you only need a small amount to get the color you want. The general rule is that the amount of pigment should be between 2% and 6% of the weight of the mixture. The best way to measure this is with a digital scale.

Lower than 2% and you may not adequately color the epoxy. Higher than 6% and you are likely to interfere with the reaction that cures the epoxy. Start off closer to 2% and add more if you want more color.

Conclusion

These are very generalized instructions, because each brand of epoxy and of pigment may have slightly different instructions for you. While they are unlikely to vary much from what is listed here, always use the manufacturers recommendations when they differ from ours.

Is Epoxy Resin Food Safe?

Epoxy has many uses in the kitchen. Because it can be both an effective adhesive and a coating material, it has both practical and purely decorative uses. It's strength as an adhesive is second to none, so you may be considering using it to repair broken items in the kitchen. Because it can work equally well with wood, plastic, fiberglass, ceramic or even metal, you can use it to repair almost anything.

Once it's cured and dried it's crystal clear and very hard, so it has plenty of aesthetic uses as well. Many people like to coat wooden tables, chairs, coasters and counter tops with epoxy. This creates a hard, protective surface that preserves the wood, looks great, and is easy to clean. Even wooden cheeseboards can benefit from a coating of epoxy. Since it adheres to metal, stainless steel tumblers can be given personalized decoration by applying a coat of epoxy and adding decorations before it's completely dried.

With its popularity in the kitchen, it's fair to wonder how safe it is to use epoxy on surfaces that will come into contact with your food. Epoxies, after all, are plastics, and it seems that every day brings a new story on how bad it is to let your food touch plastic.

EPOXY USED IN THIS VIDEO

Promise Table Top Epoxy 1 gallon

Is epoxy FDA approved?

The short answer is: kind of. First, understand that not all epoxies are safe for use in the kitchen. A lot of people use epoxy in places that it will never come into contact with food: adhesives in airplanes or cars, a clear coat over an oil painting, a waterproof layer on a wooden boat, and so on. These epoxies will never touch food, and there's no need to make them food safe.

There are FDA approved food grade epoxies though. Notice that they are food grade, not food safe. Epoxies are not sold as finished products. They are separate compounds that you mix together to create the finished product. In order to render any epoxy food safe, you have to cure it properly. So, the FDA isn't going to certify an epoxy as food-safe, because that will depend on you. Food grade epoxies will be food safe when cured correctly.

All epoxies form an inert plastic once cured, but there are plenty of inert plastic products we wouldn't consider food safe. That's because they contain bisphenol-A (BPA), which may be able to leech into our food and cause health problems (the FDA is still researching this) and volatile organic compounds (VOCs), which may also cause health problems. Food grade epoxies have lower amounts of BPA and VOCs than other epoxies.

How to cure epoxies to make them food safe

Even food grade epoxies are not food safe if they aren't cured correctly. Your epoxy should come in two bottles: one bottle of resin and one bottle of hardener. It's usually best to mix and apply your epoxies in a relatively warm space. Mixing will be very difficult if the epoxy is colder than about 75 degrees.

Important Note: Even food grade epoxies are not food safe if they aren't cured correctly.

It's also a good idea to apply epoxy in two coats, a thin seal coat that can be brushed on to seal the wood and prevent air bubbles from rising later, and a thicker coat that is poured on once the seal coat is dry. This is only necessary for porous surfaces like wood.

You need a very clean container for mixing, and accurate measuring tools. Most products will need a one-to-one ratio of resin to hardener, which means that to make your epoxy food safe, you need to use exactly the same amount of resin and harder in the mix. If your measurements are off, the epoxy will never cure completely, and therefore will not be food safe.

Mixing the two together may take a while. The length of time it takes will depend on the specific product, but you must always be careful to mix slowly or you will introduce air bubbles into the mixture. It can take several minutes of continuous mixing before the epoxy is ready to use. You will know that mixing is complete when the epoxy turns from cloudy and opaque to clear with no white streaks remaining.

Be careful to scrape the sides of the container while mixing. If any unmixed resin or hardener remains on the sides of the bucket, when you pour it out it will create uncured wet spots in the epoxy. When you pour the epoxy out, do not scrape the sides or bottom of the bucket to try and get all of the epoxy out. No matter how thoroughly you mixed, there will be small bits of unmixed epoxy there.

Be sure not to leave the bucket unattended. Epoxy is formed by a thermal reaction, and if it's left in the bucket too long it can generate enough heat to begin smoking, and can then very quickly cure inside the bucket.

Make sure that the surface you are applying epoxy to is sanded, clean, and dust free, and always wear gloves when working with epoxy. While it is safe and non-toxic, it is very sticky and it will be difficult to remove if it gets on your skin.

Conclusion

As long as you buy food grade epoxy and cure it properly, it will be safe to use on surfaces that will come into contact with your food. If you have never used epoxy before, these instructions may be overwhelming. It really isn't as difficult as it seems, but even experienced epoxy users can have problems with the cure occasionally. For that reason, if you've never worked with epoxy before, it may be a good idea to do a couple of test batches first. Pick up a two by four or some wood from a hardware store and coat it with epoxy to make sure you have the process figured out before you coat a whole counter top in it. Once you're sure that you can cure the epoxy properly, you're good to go.